A Guide to Integrating Slack and Zendesk
Improve your customer support processes and team communication by integrating Slack and Zendesk. Follow our comprehensive guide to learn how.


Effective communication and streamlined customer support are important for the success of any business. And with the rise of remote work and virtual teams, collaboration tools like Slack have become essential for real-time messaging, file sharing, and team coordination. Similarly, Zendesk's customer service software helps organizations manage their customer support tickets and interactions more effectively. Integrating these two tools can result in an efficient workflow and improved customer support, allowing teams to resolve issues faster and provide better service.
In this guide, you'll learn how to integrate Slack and Zendesk together to improve your customer support service.
Brief Overview of Slack and Zendesk
Slack is a widely-used tool that provides teams and organizations with an easy way to communicate, collaborate, and manage their workflows. One of Slack's key strengths is its ability to integrate with a wide variety of third-party tools and services, including project management software, customer relationship management (CRM) platforms, and file storage services. However, Slack's real-time messaging system can also be a double-edged sword. It can be challenging for team members to keep up with messages in busy channels, and important information can easily get lost in the noise.
Zendesk is a platform that enables businesses to manage customer inquiries and support requests. Its ticketing system, knowledge base, and reporting tools make it a valuable resource for businesses looking to provide excellent customer service. Zendesk's strengths include its ability to integrate with a wide range of third-party tools and services, as well as its flexibility and scalability. However, Zendesk's user interface can be overwhelming, particularly for new users. It also has limitations when it comes to automating tasks and workflows, which can slow down the support process and create bottlenecks.
Integrating Slack and Zendesk
Benefits of Integration
Combining Slack and Zendesk can bring tremendous growth to your customer support. Below are some of the benefits of integrating Slack and Zendesk:
- Show real-time, constant updates about Zendesk tickets events
- Manage customer support operations in one place
- Automate some parts of customer support with an answer bot
Step-by-Step Guide to Integrating Slack and Zendesk
In this section, you'll integrate Slack and Zendesk. But before you proceed to the first step, it's important to note that you must have administrator permissions in both Slack and Zendesk in order to achieve this integration. You must also have permission to install apps into the Slack workspace. This is because the integration requires you to accept permissions from both tools.
1. Sign in to your company's Slack workspace.
2. Go to the Slack Apps directory for Zendesk to install the app.
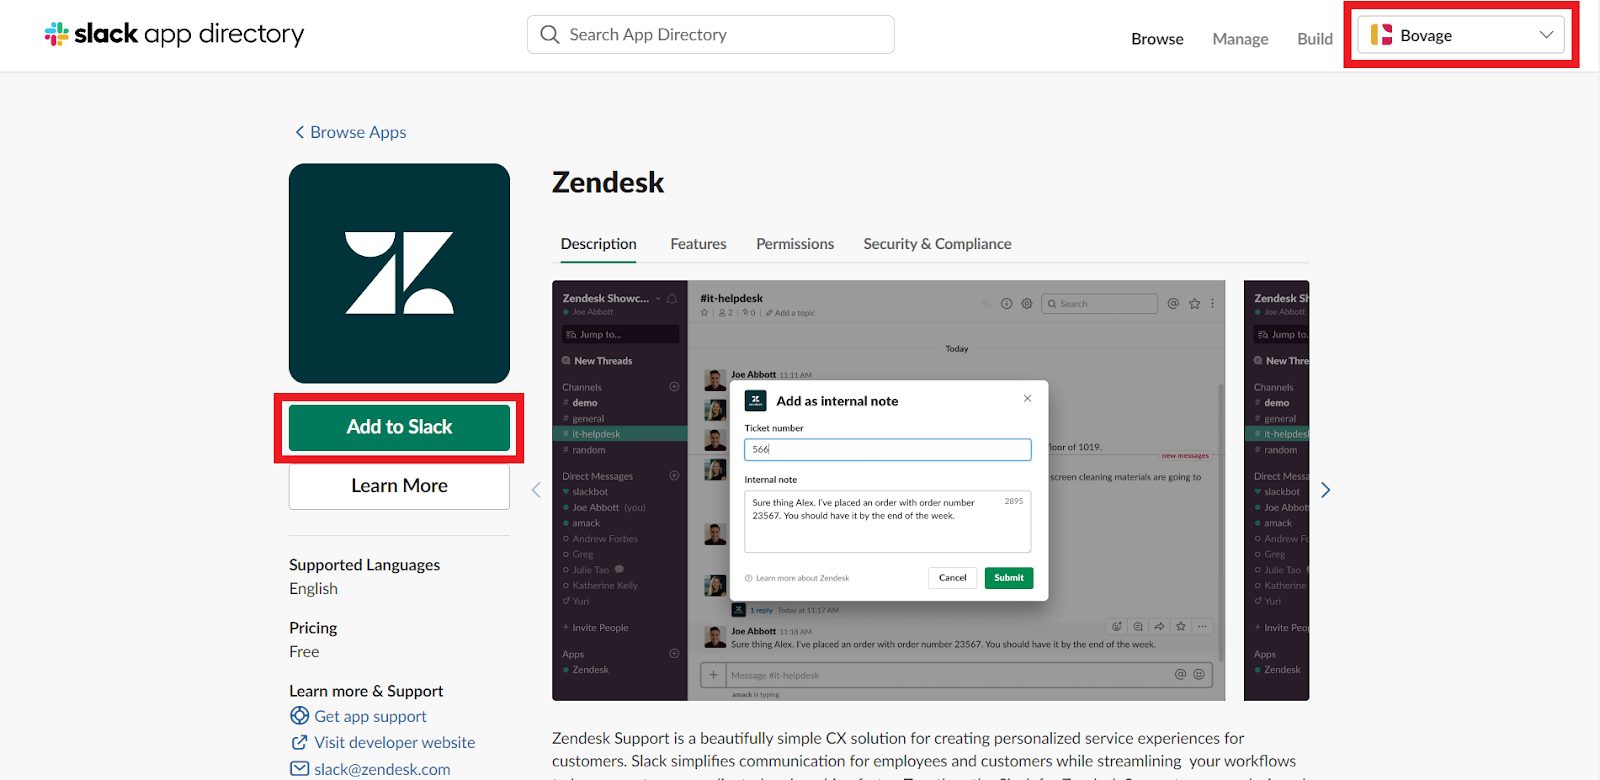
Zendesk App Page on Slack App Directory
3. On the Zendesk app page, click on the Add to Slack button.
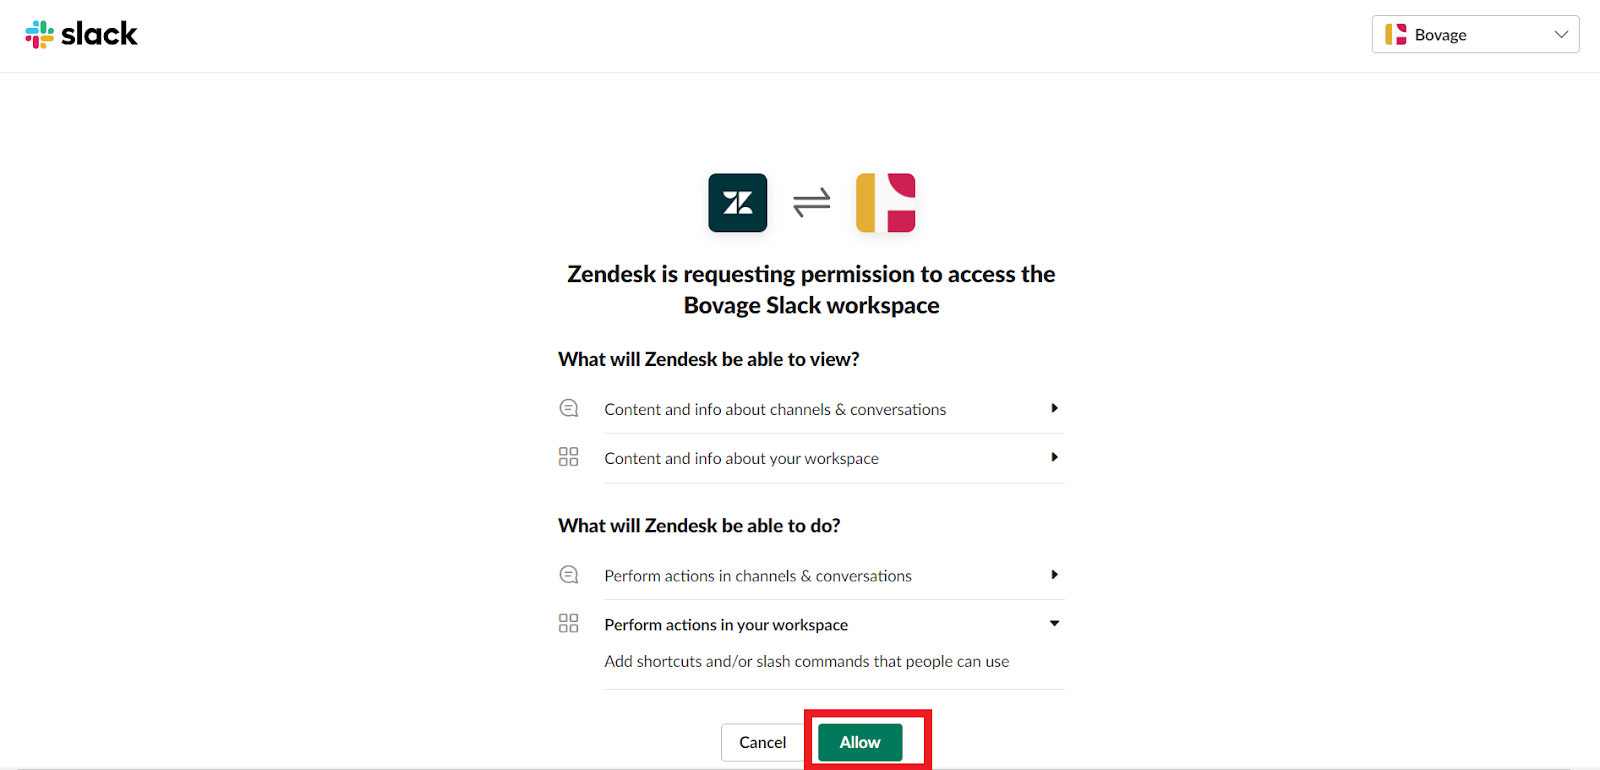
Zendesk OAuth Consent Screen, requesting permission to access a Slack workspace
4. On the OAuth consent screen, click on the Allow button to approve the request for Zendesk to access your Slack workplace. It's important to review the permission that the consent screen shows before assenting to the permission request.

Slack OAuth Screen, requesting permission to allow Slack to access your Zendesk account
5. Click on Allow again on the page that requests your permission to allow Slack to access your Zendesk account.
6. Once the setup is successful, your browser will display a page similar to the one in the image below.

Success Page that shows you have integrated Slack and Zendesk successfully.
7. Go to your Slack workspace to confirm that the Zendesk app now shows on the app section of your workspace.
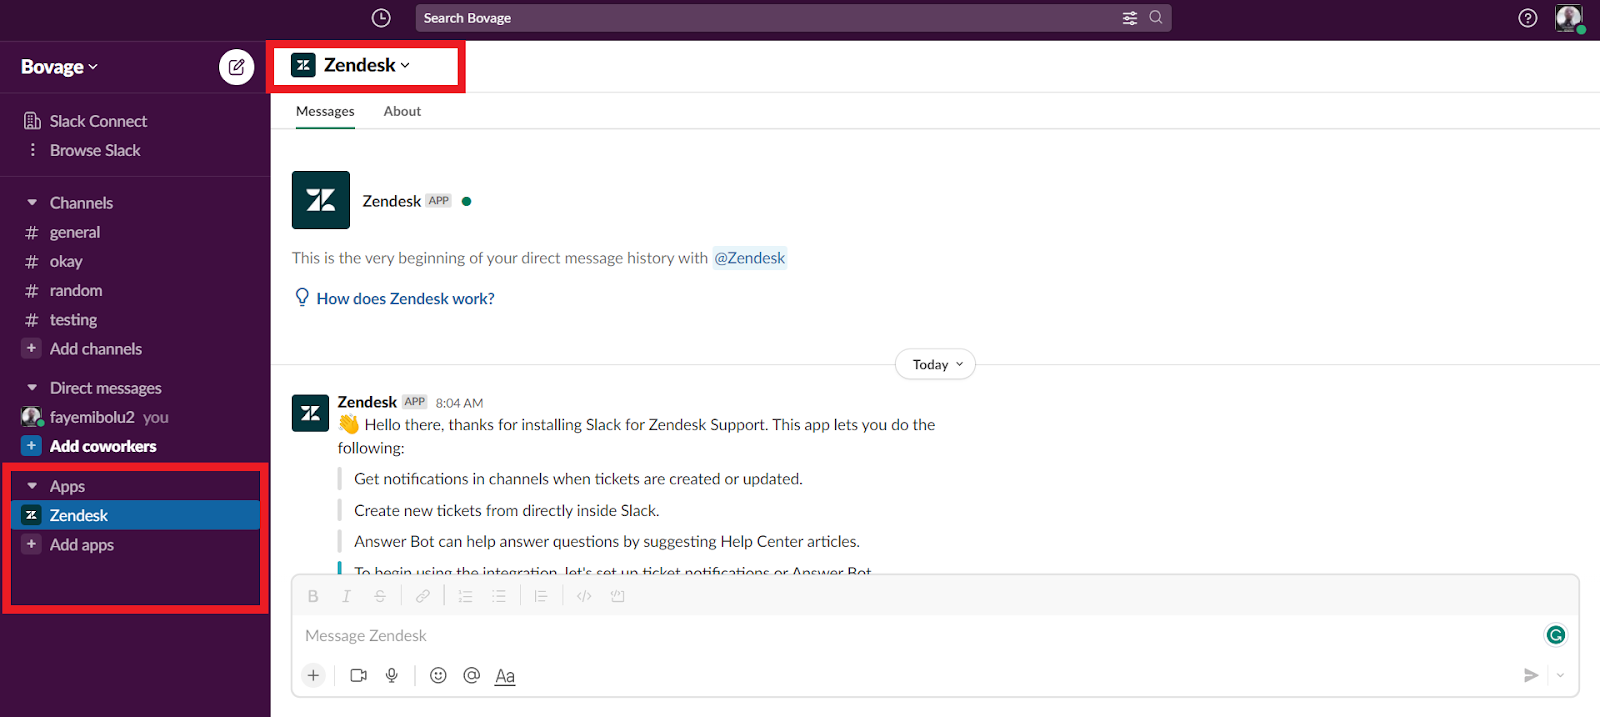
A Slack Workspace showing that you have successfully added the Zendesk app
Adding Zendesk App to a Slack Channel
In order to take advantage of the Zendesk triggers for Slack and the answer bot, you need to add the Zendesk app to a specific channel.

Adding Zendesk App to a Slack Channel
1. Create or go to the channel you want to add the Zendesk app to.
2. Enter this command into the channel's message box: /invite @Zendesk
You can now configure Zendesk to send notifications about ticket creation and updates to this channel and also add an answer bot to this channel.
Configuring Zendesk to Send Notifications to a Slack Channel
Team members and workers often prioritize Slack notifications, and there's a sense of importance and urgency attached to them. Customer support processes can be hastened by taking advantage of this. To this end, you can configure triggers to notify users in a channel about events on Zendesk tickets.
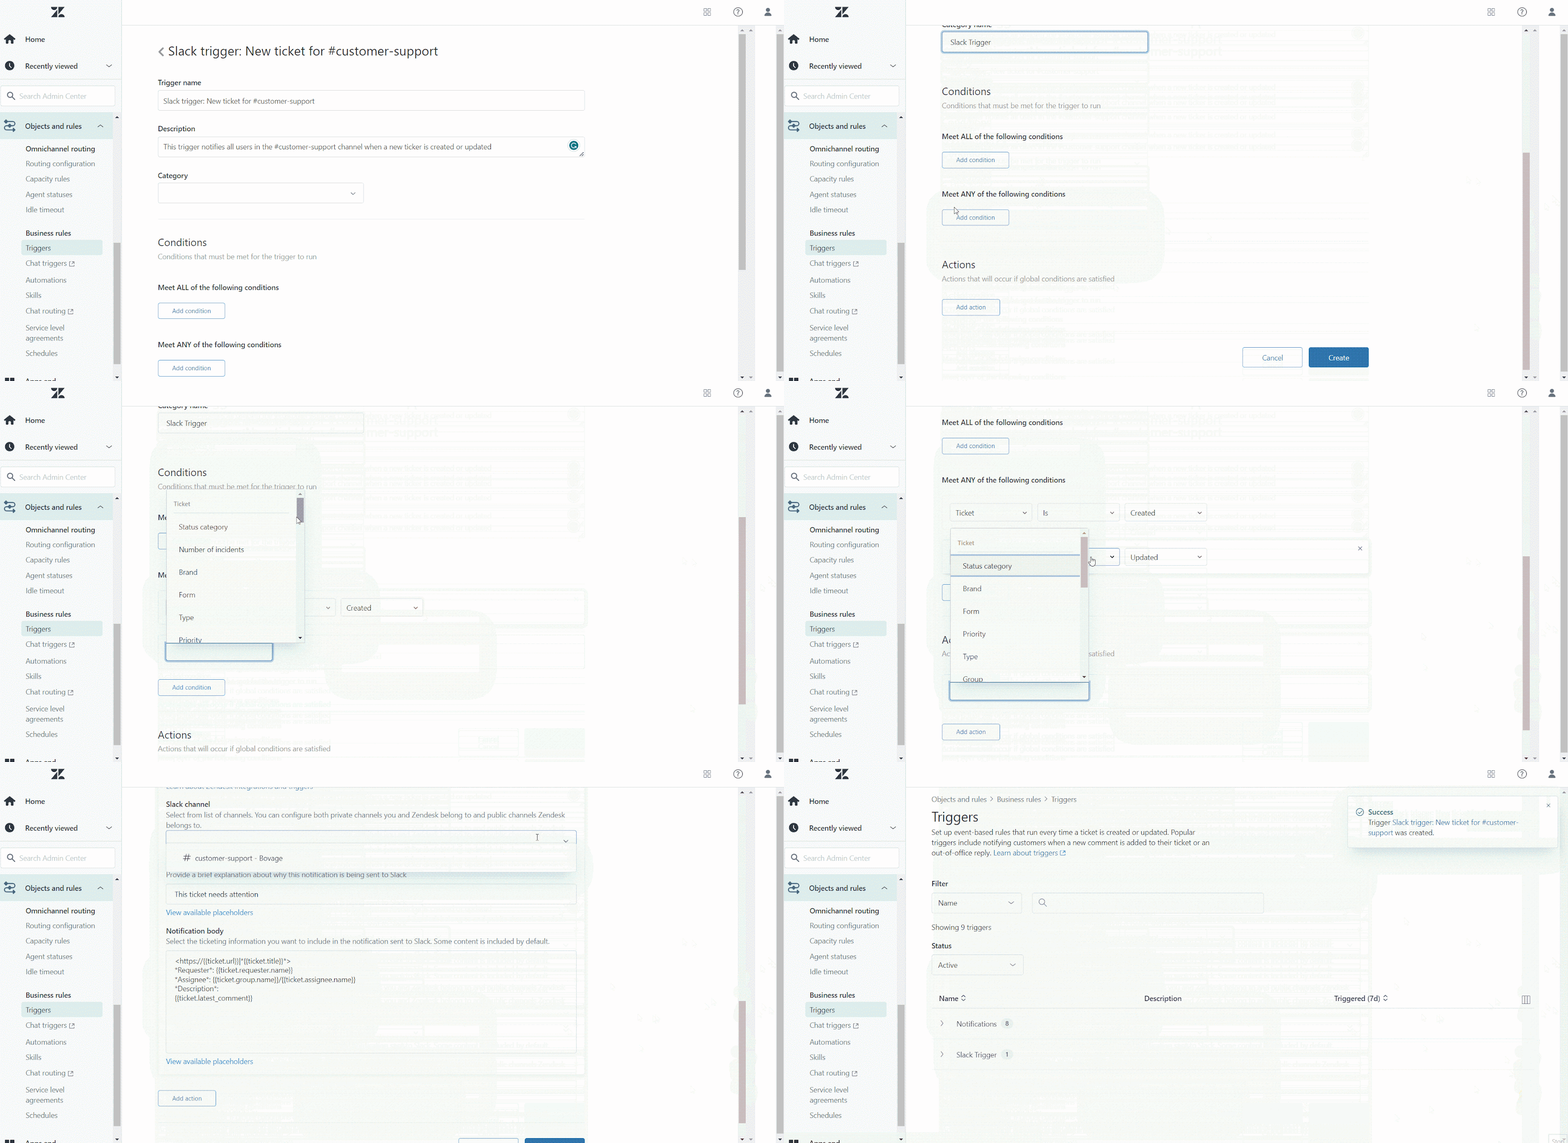
Follow the steps below to create triggers for Slack:
1. Click on the grid icon highlighted in the image below, and then click on Admin Center in the drop-down menu. Or you can simply go to this path: admin/home
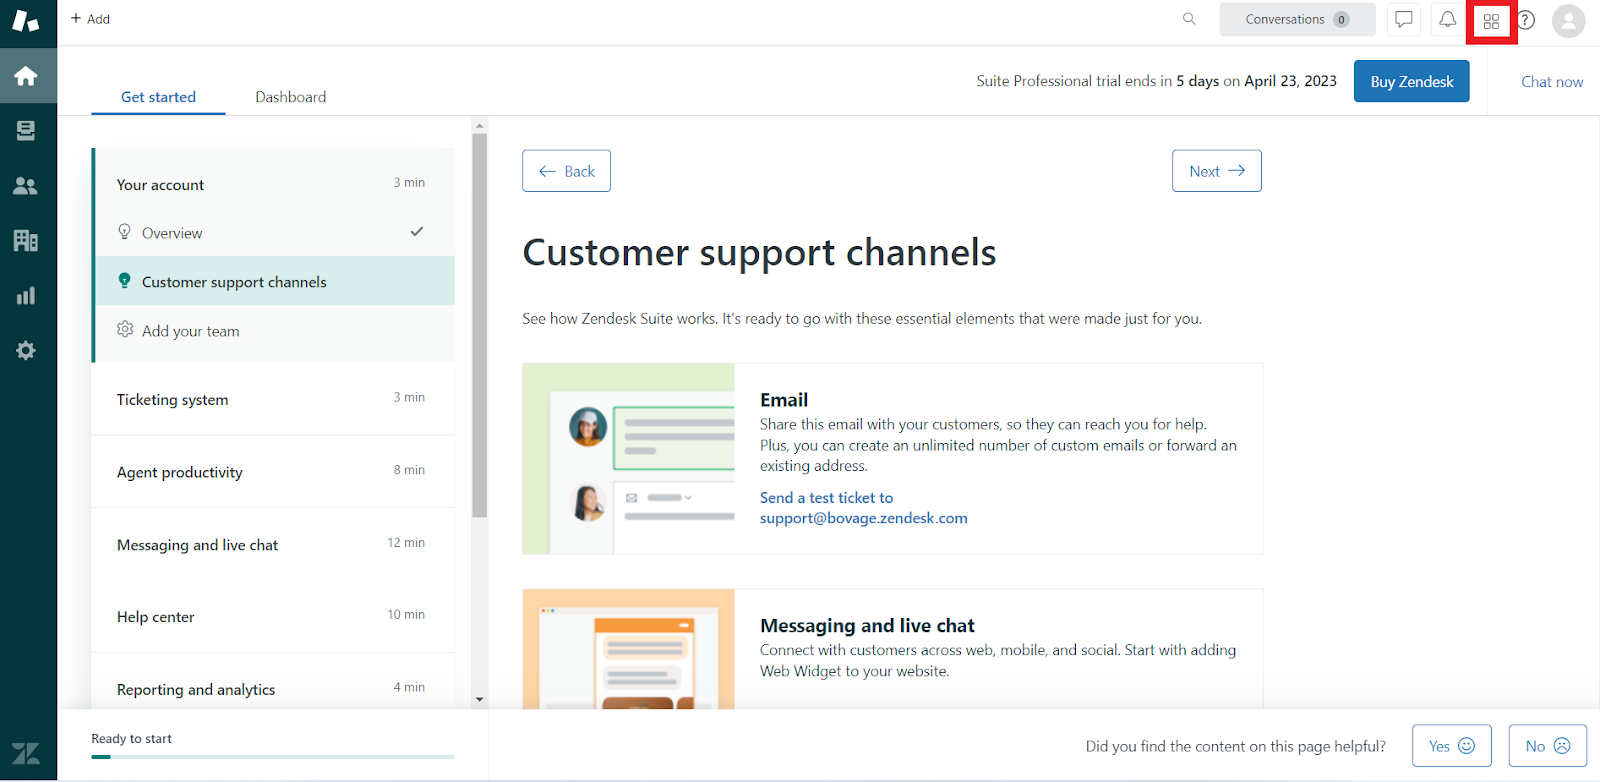
Zendesk Dashboard
2. Click on Objects and rules on the left side navigation of the Admin Center page, then select Business rules > Triggers.
3. Click on the Add Triggers button.
4. Enter the name of the trigger. Zendesk recommends that you include the Slack channel in the trigger name for easier identification (e.g., Slack trigger: New ticket for #customer-support).
5. Enter a description for your trigger to provide information about the purpose of the trigger (e.g., "Notifies all users in the #customer-support channel when a new ticker is created or updated"). This field is optional but recommended.
6. Choose an existing category or create a new one. Zendesk recommends creating a Slack category for your Slack triggers. If you are creating a new category, enter the desired name.
7. Click the Add Condition button to set up the trigger to meet any condition or all conditions. The trigger will be fired when the conditions set here are met.
8. Select a Condition, Field operator, and value for each condition you add. The field operator determines how the condition and value are compared to each other. As an illustration, if you select the field operator Is not, your condition must not be equal to the value. It's important to note that the field operator is not limited to only Is and Is not, as different conditions come with different field operators. You can refer to the building trigger condition statements documentation for further guidance. However, keep in mind that simple is always better than complex! Zendesk even recommends that you keep your trigger statements simple.
9. Click on the Add action button, then select Notify Zendesk integration and Slack integration from the drop-down lists.
10. In the Slack channel field, choose the channel you want notifications posted in. (Note: In the drop-down list, you'll see only channels that the Zendesk app is a member of. In order to see more channels here, add the app to certain channels.)
11. Enter the Notification header and body in their fields. By default, a simple notification header and body have been created for you. You can make use of markdown to format the text rendered in the alert or notifications message. You can also add more context to the content of the notification by making use of the available placeholders.
12. Click on the Create button.
Note: When setting up notifications, it's important to set up alerts and notifications in a way that doesn't overwhelm team members. Customize and filter notifications based on which types are most critical, and use trigger conditions to ensure you receive only relevant alerts. Test the integration and adjust notification settings as needed.
How-To Examples
Now that you've integrated Slack and Zendesk, it's essential you know how to use this Slack-Zendesk integration. In this section, you'll use the integration to create a Zendesk ticket without leaving a Slack channel. Note: Ensure the Zendesk app is a member of a Slack channel where you want to receive notifications and do all things related to Zendesk or customer support.
How to Create a Zendesk Ticket in Slack
With this integration, users can create tickets directly in Slack and assign them to the appropriate agents in Zendesk Support. The owner of the ticket is automatically set in Zendesk to the individual who created it in Slack. There are three ways to create tickets directly in Slack:
1. By using the slash command, /zendesk create_ticket, which enables you to create a ticket without an original Slack message.
2. By utilizing a Slack action, which transforms a Slack message into a ticket.
3. By mentioning @zendesk in a message in a Slack Connect channel.
However, in this guide, you'll make use of the slash command to create a ticket directly from Slack.
Creating Zendesk Ticket from a Slack Channel Using the Slash Command.
1. Enter this command in the Slack channel: /zendesk create_ticket
2. Fill in the Create New Ticket form with the following details:
- Subject: A concise and descriptive subject line that summarizes the issue.
- Requester: The person submitting the issue or report.
- Assignee: The name of the Zendesk group you want to assign the ticket to.
- Description: A more detailed description of the ticket. The information in this field is publicly accessible.
3. Click on the Submit button. A ticket will be created on Zendesk support with the details entered into the form. You'll also receive a notification message in the Slack channel you created the ticket.
Disconnecting the Zendesk App From Your Slack Workspace
In case you're no longer interested in making use of the integration or have switched to another customer support tool, you can remove the Zendesk app from your workspace by following the steps below:
Removing the Zendesk App From a Slack Channel
1. Go to the channel where you want to remove the app from.
2. Enter the command /remove @Zendesk and then send the message.
3. Click the Remove button on the confirmation dialog box.
Removing a Slack Workspace From Zendesk Integration
1. Go to Zendesk Admin Center and click Apps and Integrations in the left navigation bar, then select Integrations > Integrations.
2. Click View in the Slack section.
3. Click Configure under the name of the Slack workspace you want to disconnect.
4. Click Actions, then click Disconnect from the drop-down menu.
5. Click the Disconnect button in the confirmation dialog box.
Wrangle is Revolutionizing the Help Desk in Slack
We’ve demonstrated that Slack is a complementary tool for empowering your support team. Zendesk’s integration with Slack offers their support teams basic functionality, but if you’re interested in fully unleashing the potential of a help desk in Slack, there are alternatives to consider.
Wrangle acts as your company’s IT help desk in Slack, allowing employees to create tickets or access workflows that automate business processes. IT teams can simplify the organization of tickets and requests, while the end-user has the simplicity of making requests and issues in their Slack channels.
Agents can access a central web UI to manage their work. From here, they can prioritize and respond to issues. The agent responses show up as replies to your users comments in Slack.

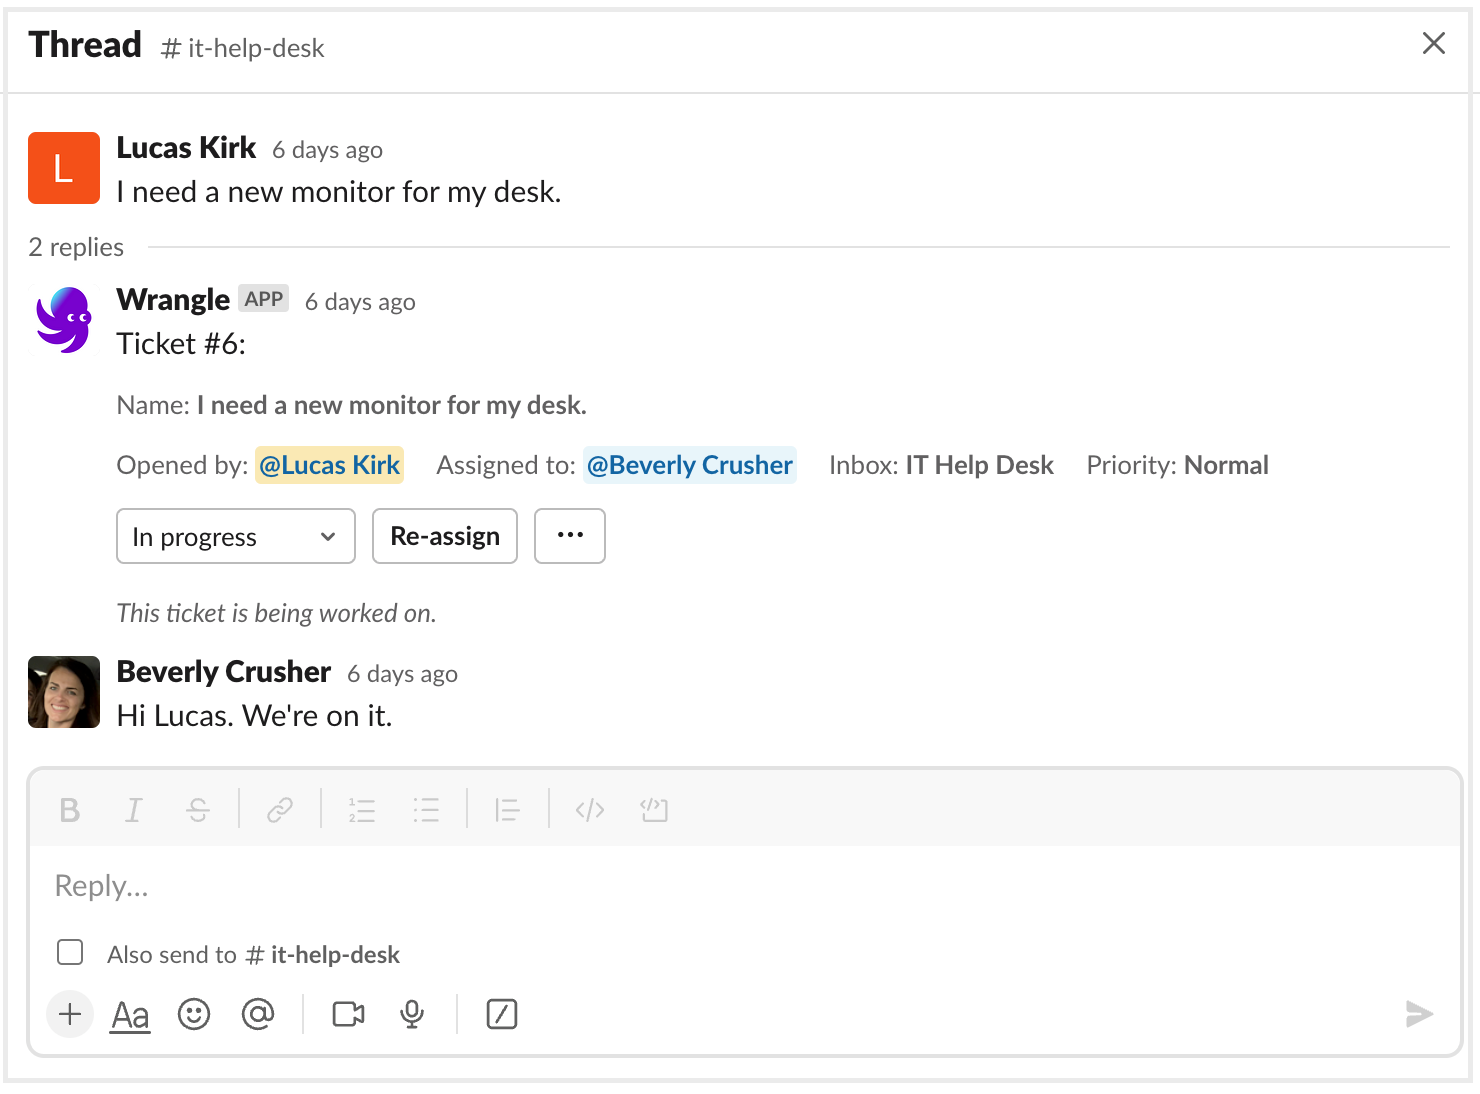
The combination of ticketing and workflows make for a productivity powerhouse, ensuring your end users receive fast and efficient support without the need for logging into a web platform. Creating tickets and accessing workflows is as easy as writing a Slack message.
Conclusion
This guide outlines the steps for integrating Slack and Zendesk, which can offer significant benefits for businesses in today's fast-paced environment. However, it's important to note that both Slack and Zendesk have some limitations that can impact their effectiveness. To address these limitations, Wrangle offers a solution to transform your Slack channels into a powerful IT helpdesk.
This post was written by Boluwatife Fayemi. Boluwatife is a Full Stack Web Developer, proficient in Javascript, Python, and their frameworks. His curiosity makes him explore and gain knowledge about a variety of topics. Boluwatife is passionate about teaching and writing, and this makes writing technical articles an enjoyable process for him.

- Try Wrangle free for 14 days
- Turn messages into trackable tickets
- Build a scalable help desk


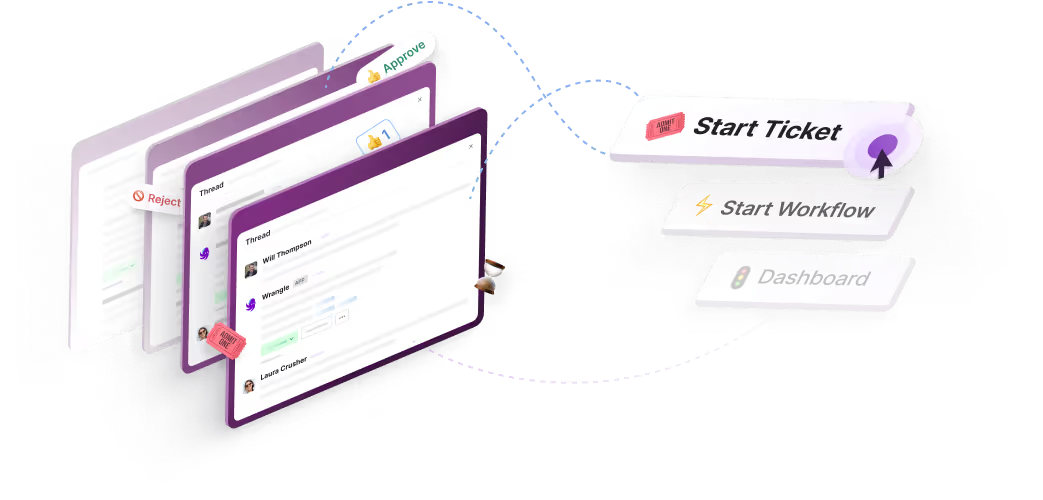
Turn Slack into a productivity powerhouse with Wrangle
Create a scalable helpdesk in Slack. Automatically turn messages into trackable tickets and provide faster, more transparent service to your colleagues and customers with Wrangle — Try it free!


